Saturday, December 31, 2011

The Croquembouche Project

I received my first Martha Stewart book from my sister Kathy in 1988.  Since then, the traditions of Christmas have never been the same. Let's face it.....Martha raised the bar on Christmas. Once upon a time, I was content making a batch of toll house cookies and serving them on a festive snowman plate for the holidays. Until Martha.

The first book that I received was all about the holidays.....lots of recipes and decorating ideas.


I was mesmerized.

I slept with the darn thing under my pillow. Since that time I think I have recreated almost every single item from that book. Except for one. The Croquembouche. Martha's Croquembouche from the book would feed 100 guests and was made with spun sugar "glue" to hold the puffs in place. It was stunning.


(sigh)

That Martha.......aside from the fact that she has a staff of about 100 people to help her.......How does she do it? From that moment, I secretly resolved to add this one to my bucket list..............and this was the year that I was going to do it.

When I announced my plan to my sister Kathy, she roared with laughter.....especially since I have been talking about making this Croquembouche for about 20 years. Herein lies the problem with making that type of declaration..... YOU. HAVE. TO. DO. IT.  CRAP.  What did I get myself in to? Every year I spend Christmas Eve at my sister's house with lots of friends and family stopping by, so I knew that the Croquembouche would be one of the highlights on the buffet table.

No pressure.

First, a bit of history on the Croquembouche.  Croquembouche is a French dessert made by stacking cream puffs in a conical shape and cementing them together with a toffee. The dessert is typically ornamented with sugared almonds, or other ingredients, and it is designed to be displayed as the centerpiece of a table. This dessert has been used at French weddings, christening and celebrations for centuries, and it is served outside of France to add a French flair to an evening's events. It appears to have been invented by French pastry chef Antoine Careme (1783-1833) in the late 1700s, when it became very popular as a wedding cake. Many of the individual components such as the cream puffs date to the 1500s, illustrating the long history of fine pastries in France.

Since it was Christmas Eve and I was really pressed for time, I was a bit remiss in my photography. Sorry...next time I will be better prepared, I promise.   :)

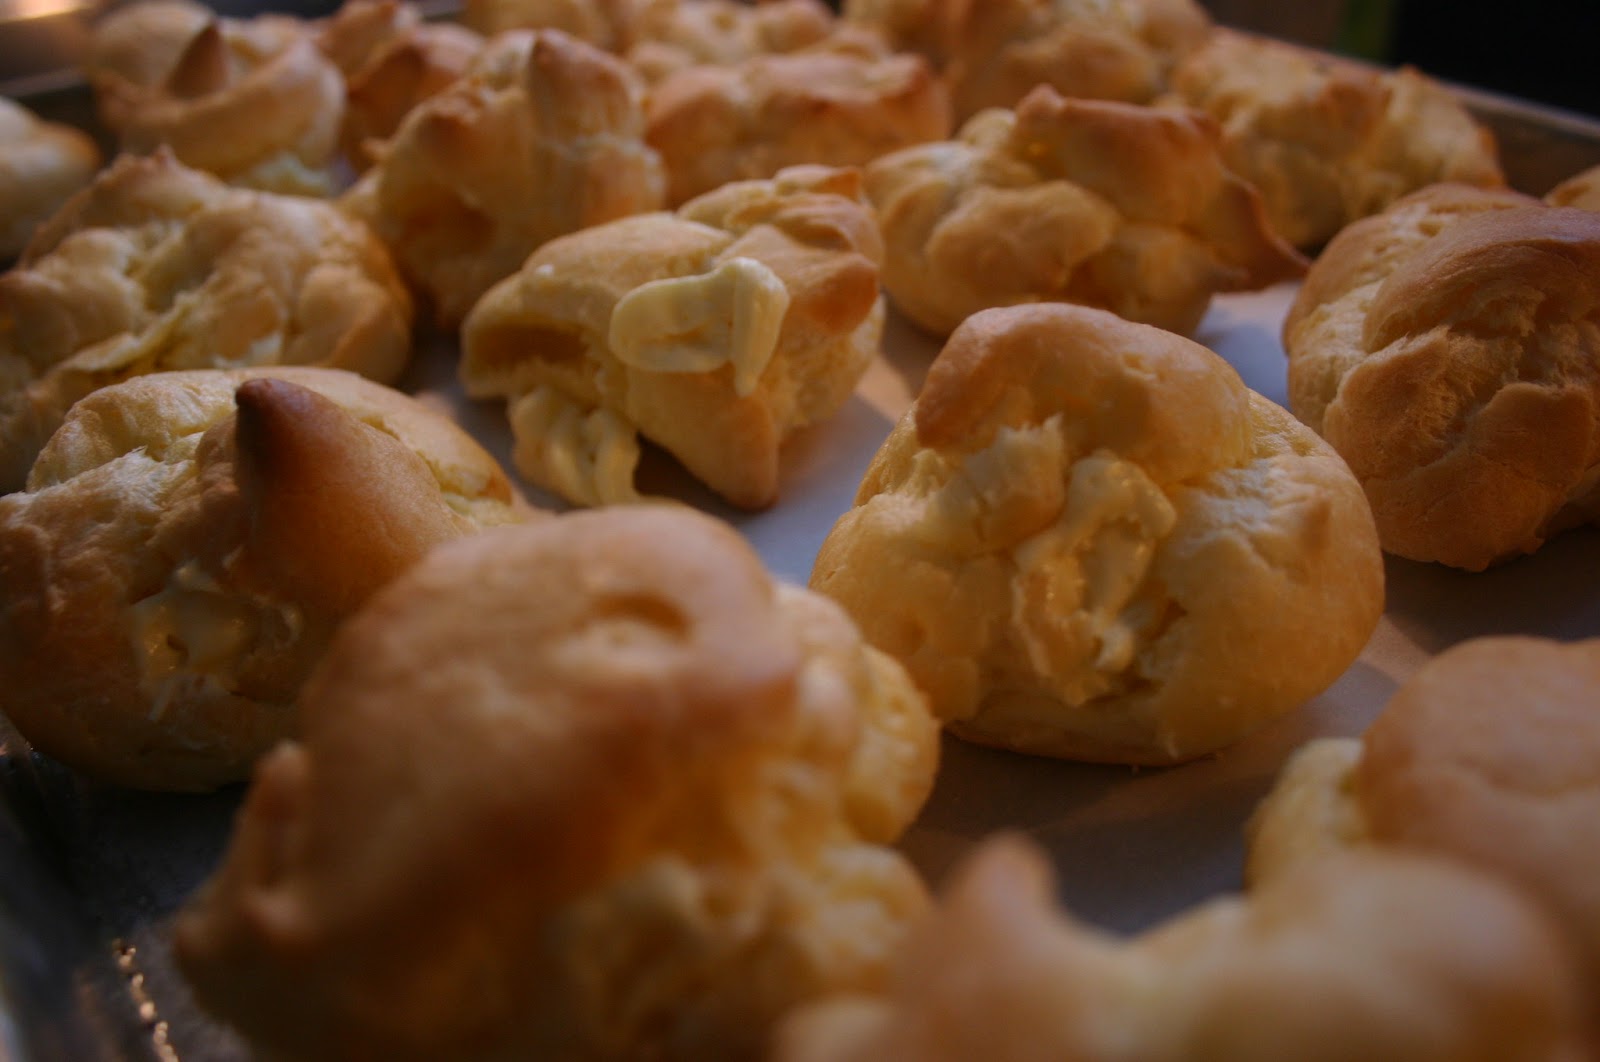
The first thing I did was to make the creampuffs, alias profiteroles. Kathy and I got this recipe from the former head baker of a famous North End Bakery.............so we know it works.

Cream Puff Recipe

1 cup water
2 sticks of butter
1 cup flour
4 eggs

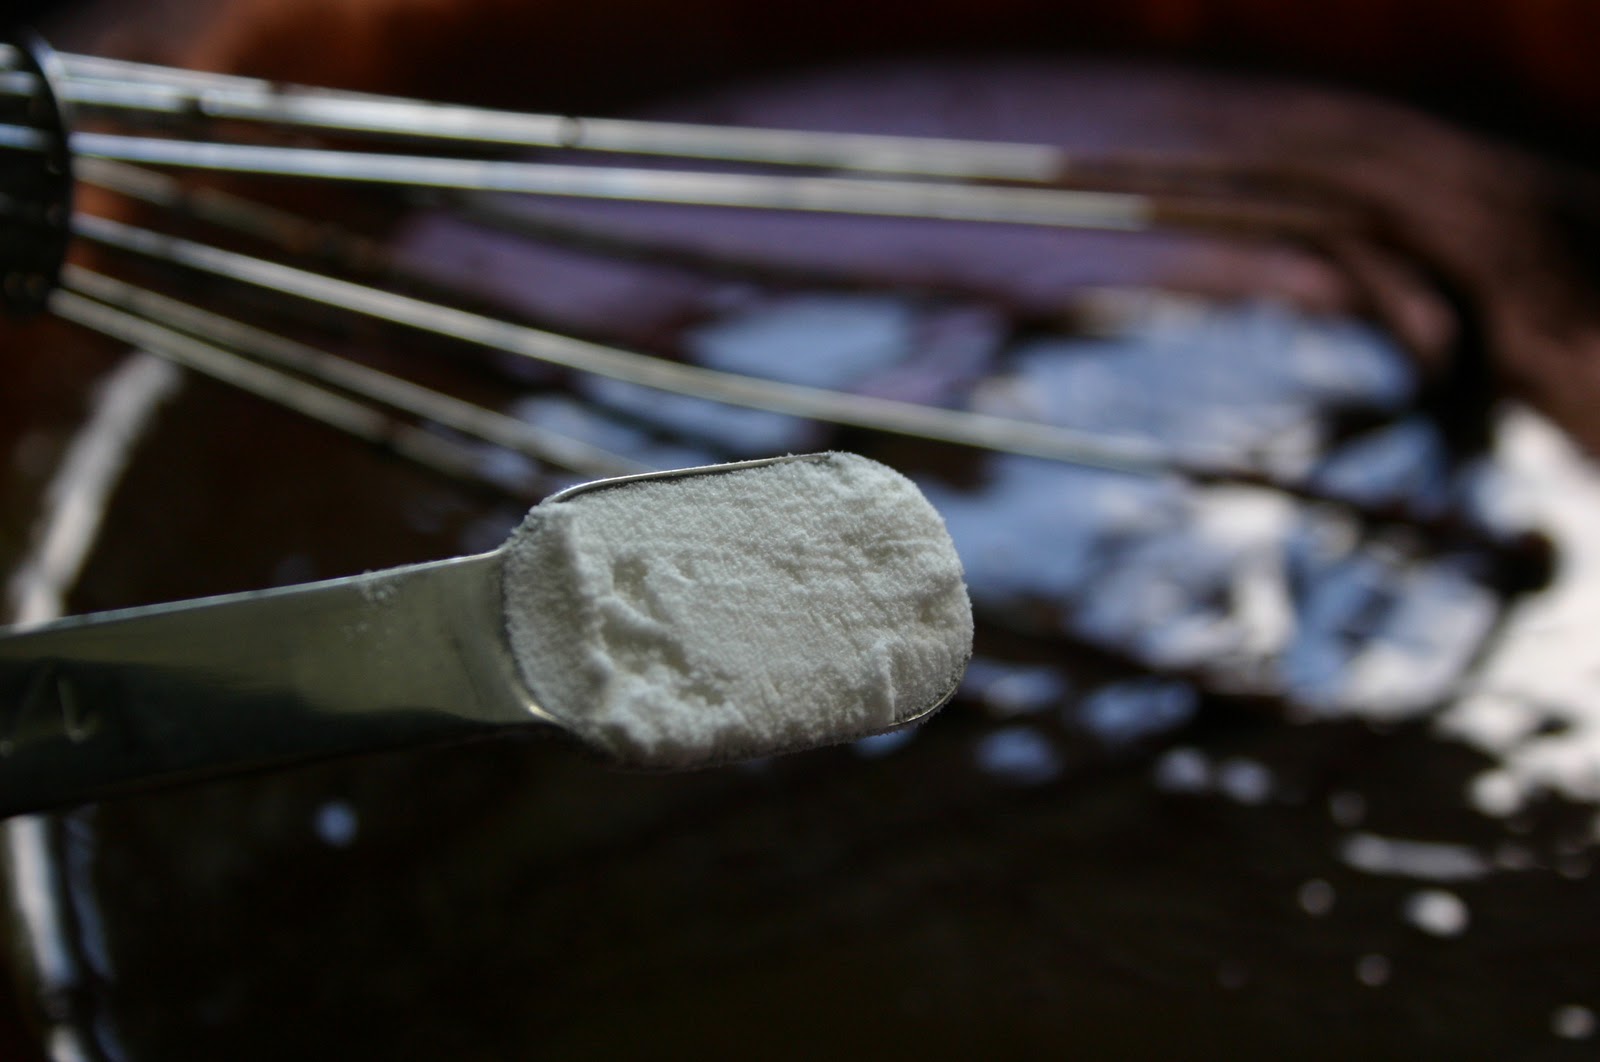
Pre-heat your oven to 400 degrees. Using a large pot (I used my favorite Big Blue), bring water and butter to a vigorous boil, then remove from the heat and add the flour, quickly stirring with large a wooden spoon until the mixture coagulates and pulls away from the side of the pot.  Transfer to a mixing bowl and using the wooden spoon, spread the mixture out along the sides of the bowl to help it cool down. After about 5 minutes, start the mixer and add one egg at a time, beating vigorously in between each one.  After adding the fourth egg, you will notice that the mixture has taken on a smooth and thick consistency. When this happens, it's ready.

Drop by heaping teaspoonfuls (or pipe with a pastry bag) onto a parchment paper covered baking sheet, leaving about 2 inches in between each one.  You want to keep the portions on the smaller side for the Croquembouche.  Place in the oven for 25-30 minutes or until golden brown. Remove from the oven quickly and set on a rack to cool off completely.


Cream Puff Filling

1 box Vanilla Pudding, follow the directions on the box and place in the fridge to cool.


When pudding mixture is cooled, I used a piping bag with a 1/4 inch tip and injected about 1 tablespoon of the cream into the center of each puff. Then I put them on a large baking sheet in the fridge until I was ready to build the structure. 


I made a mold for the Croquembouche out of poster board, packing tape and parchment paper, then I used a fat glass vase to hold it upright.


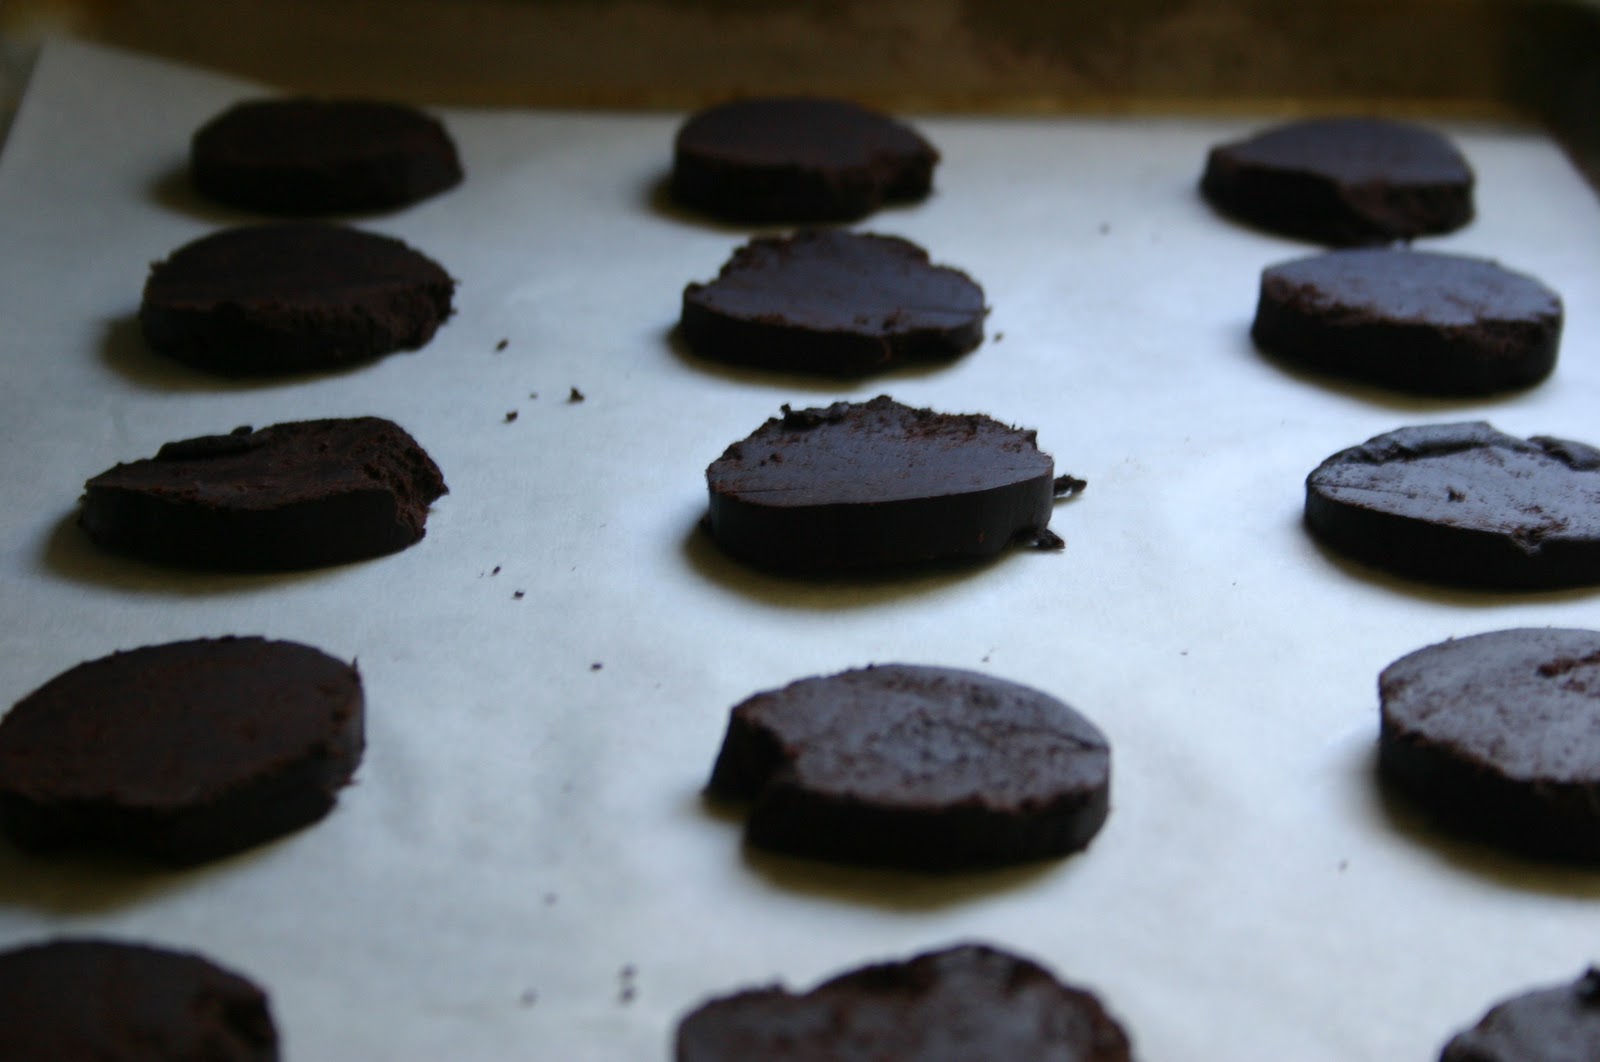
Now, a traditional Croquembouche uses carmelized sugar to "glue" the puffs together............but since when have I ever been "traditional"?  Since I was working against the clock, I decided to use a more familiar medium. Or should I say, "Medi-YUM"!


In my research I discovered that there are a couple of different ways to construct a Croquembouche. Some pastry chefs use a Croquembouche mold and stack the puffs outside the cone. It's the easiest method of construction and if you are making the dessert to bring to someone's house, your chances are considerably better that you will arrive in one piece. You can also freeform the cone, but this means that you will need to have many more creampuffs on hand to make the foundation. Of course, if you like to live on the edge, you can build the tower inside of the cone too.  A little trickier, but much more fun I think.   Guess which way I did it??


Working quickly, I dipped each puff in melted chocolate and placed it inside the cone along the outside. The idea is to attach each puff along the inside of the cone. The center of the cone is supposed to be hollow. When I got to the top, I tried to make it as level as possible. Okay, I'll let you in on it...... I had to  squish down some of the creampuffs to level it out. Then I put the whole thing in the fridge for about an hour to chill and harden up.   

Once it was was chilled, I placed a plate on the widest part of the cone and carefully inverted it. After a few strategic taps on the side of the cone, the croquembouche unmolded itself.


It's not as pretty as Martha's, BUT with the exception of actually baking the creampuffs, I finished the whole thing in just under an hour. Seriously.

A few red raspberries dipped in chocolate and fresh whipped cream piped in between the puffs and I was ready to go. Kathy whipped up a small crockpot full of hot fudge so guests could help themselves to dessert. 

 It was a Christmas Eve show-stopper!


Happy New Year everyone!!

Monday, October 10, 2011

Homemade Oreos!


When I was a kid, nothing was better than a stack couple of Oreo cookies with a tall glass of cold milk.


There was only one problem, my mother wouldn't buy Oreos. Something about them being "too rich or too heavy" (insert rolling of the eyes here)....I don't know. Knowing my mother.....I'm sure that the price of Oreos had a lot to do with it. She bought Hydrox cookies instead. But she couldn't fool me. Even at the age of ten, I always knew that the Hydrox cookie was simply a cheap Oreo "knock-off". It looked the same, but was light years away from that rich chocolate Oreo taste and creamy white filling.


Since my Oreo mainline was cutoff at home, I was forced to get my Oreos on the outside. Bus stops, school lockers, the cafeteria. But seriously, what kid in their right mind wants to swap an Oreo for a Hydrox cookie at lunchtime? I instead preferred to befriend those who had small stacks of of them tucked into the crevices of their lunchbox's. Who were willing to share.


Everything's changed now. Now that I have that recipe, I don't have to behave like that anymore. Er.....I mean, people won't have to behave like that anymore. Anyway, where was I?.........ah yes.

The oreo's that are sold at Flour Bakery are phenomenal. Colossal. They are oversized deep, dark chocolate dreams. And after taking a baking class at Flour Bakery, now I know how to make them.

(cue the diabolical laugh)

Oh wait. By the end of this post.............you will too. Curses. Keep in mind that this is not a quickie recipe. But if you do all the leg work the day before, you and your family and friends will be munching on homemade Oreos the very next day.


Flour Bakery's Homemade Oreos


  2 sticks of unsalted butter, melted
3/4 cup sugar
1 tsp vanilla
1and 1/2 cups of all purpose flour
1 cup semisweet chocolate chips, melted
1 egg
1 1/2 cup Dutch processed cocoa powder
1/2 teaspoon baking soda


Combine the melted butter, sugar and vanilla in a medium bowl and whisk until combined. Whisk in the melted chocolate. Add the egg and whisk until combined.

Use a wooden spoon to stir in the flour, cocoa powder, and baking soda until thoroughly mixed. Add flour mixture to butter/chocolate mixture and stir until fully combined. It will have the consistency of playdough. Cover the dough in plastic and refrigerate until firm, at least 4 hours or overnight. If you leave it overnight you will have to let it soften for a bit to work with it....a few hours at room temperature.

Divide the dough in half and place each half on a 15-inch square sheet of parchment or waxed paper. Shape each half with your hands into a rough log shape, about 12 inches long and 2 inches in diameter. Place the log on the edge of the parchment square and roll the log up. Refrigerate the logs until firm about 2-3 hours.

Note: You can prepare the dough up to this point and refrigerate it (wrapped in plastic) for up to a week or in the freezer for up to a month (if frozen, remove the dough from the freezer the night before you want to bake it and defrost in the fridge)

Heat the oven to 325 degrees.

Remove the parchment from the logs of dough and slice the logs into 1/4 inch thick slices. Place the slices about 1 inch apart on a greased or parchment lined cookie sheet and bake for 20-25 minutes, until firm to the touch. Check them frequently after 16 or 17 minutes by poking them in the middle. When they feel firm to the touch, pull them and let cool on the baking sheet.

Oreo Filling

1 stick unsalted butter, softened
1 2/3 cups confectioner's sugar
1 teaspoon vanilla
1 tablespoon milk

In bowl of a stand mixer, soften the butter until pliable. Add the confectioner's sugar and vanilla and beat until smooth. Add the milk and beat until smooth. Scrape well and remix. The filling keeps in an airtight container at room temperature for up to 2 days or in the refrigerator for up to 2 weeks. Bring to room temperature before using.

Use a tablespoon to scoop out a rounded tablespoon of Oreo filling and place it in the middle of one of the Oreo cookies. Press another cookie on top to distribute the filling toward the edges.


Remember to organize and pre-measure all of your ingredients. It really does make the task SO MUCH easier!


Combine the melted butter,


...with the melted semi-sweet chocolate chips and the vanilla.

Whisk it all together,

...add the egg and continue to mix...

Then add the baking soda,


flour,


...and cocoa powder. Try to use the very best cocoa  you can find. It really does make a difference. I used Valrhona that I purchased at Whole Foods.


After combining all the ingredients, the mixture will look like this. Keep mixing and turning until it almost has the consistency of Play Dough.


Then you are going to form it all into a loaf and wrap it in plastic wrap. Yes, I know. I have enough plastic wrap for the entire crew of Biosphere 3. But...... it is so easy to use. No more fighting with that little metal jaggy thing on the outside of the carton. With this commercial sized container, you just pull out the amount that you need and slide a little knob (a hidden blade) across the wrap....and voila! I love it!! 


Now, as I said earlier, this recipe is either an all-day event OR a two day event. But once the dough has been sufficiently chilled, you may proceed to the next step.


Remove from the fridge and slice the dough in half.


Then shape each section into a chocolate log. Keep in mind that this is easier said than done. It should be perfectly round. Please note that mine was not. All part of the learning curve.


Then, wrap each section in parchment paper, then plastic wrap,


....then put them back in the fridge to chill some more.


See what I mean?  Not a perfect log. What I neglected to do was to re-open the  log packages halfway through the chilling process and re-shape them. Hint. Hint. If you do this, it will make the rest of the process much smoother and you will have a much rounder cookie.


I like to line my cookie sheets with parchment paper. It makes your clean-up a snap.


Slice each log into 1/4 inch slices,


...and place them about an inch apart on the cookie sheets.


Bake in a 325 degree oven for about 20-25 minutes. Check them at 22 minutes. You want them a little on the firm side, but not hard. Watch them as they can burn quickly.


Place them on a rack to cook completely. Did you hear me? I said "cool completely".
That means no nibbling!

While they are cooling, you can whip up your filling. Trust me....it will take your mind off of the cookies.


Add vanilla and softened butter to the confectioners sugar...


...then add the milk..er, um...except that I used Half and Half.


Then mix it all furiously together.


Take a cookie and spread it with some filling.


Gently press another cookie against the filling.


I refridgerated the cookies until the filling firmed up,

...but it's totally up to you.


So now it's just you, the cookies and a big glass of milk.

  Big sigh.

What should you do first? Dunk the whole think in milk?  Unscrew the top and scrape off the yummy vanilla filling with your teeth??


How do YOU eat an Oreo?