Tuesday, March 31, 2009

Happy April Fool's!

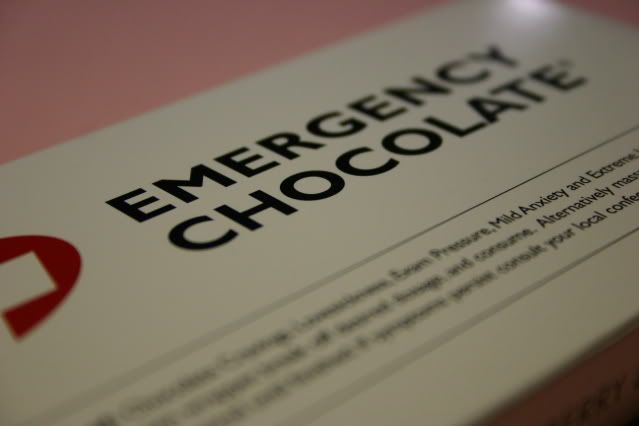
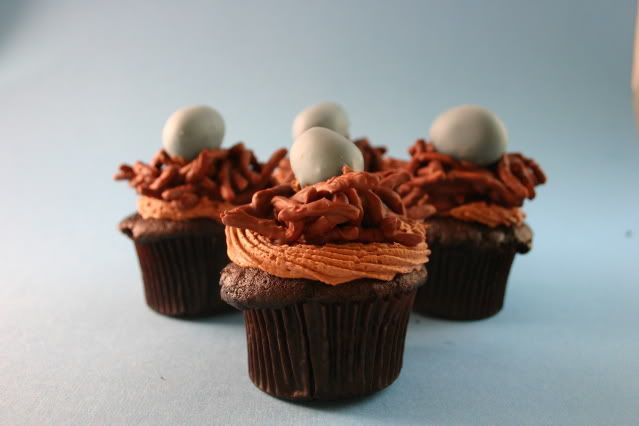
Guess What?? http://www.cupcakestakethecake.blogspot.com just posted my April Fool's Cupcakes as their feature cupcake for their April 1st, 2009 webpost. Wow! This is exciting!

(I am such a dork!)


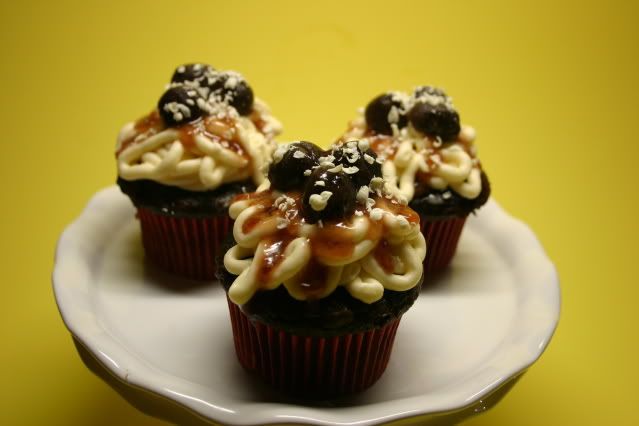
Have you ever wondered why we recognize April Fool's Day??

Of course I've always wondered why. I can't help it. It is just in my nature to find out about things. I'm naturally curious about almost everything. I guess it's good...in a way. I need to know how things work, why they work, when they work, who makes them work, what time do they get out of work......and so on. You get the picture.


Well, my "research" showed that the closest point in time that can be identified as the beginning of this tradition was in 1582, in France. Prior to that year, the new year was celebrated for eight days, beginning on March 25. The celebration culminated on April 1. With the reform of the calendar under Charles IX, the Gregorian Calendar was introduced, and New Year's Day was moved to January 1. However, communications being what they were in the days when news traveled by foot, many people did not receive the news for several years. Others, the more obstinate crowd, refused to accept the new calendar and continued to celebrate the new year on April 1. These backward folk were labeled as "fools" by the general populace. They were subject to some ridicule, and were often sent on "fools errands" or were made the butt of other practical jokes. Over time, this harassment evolved into a tradition of prank-playing on the first day of April. The tradition eventually spread to England and Scotland in the eighteenth century. It was later introduced to the American colonies of both the English and French. April Fool's Day thus developed into an international fun fest, so to speak, with different nationalities specializing in their own brand of humor at the expense of their friends and families.


Makes perfect sense, doesn't it? Although why couldn't they just say that this must have been when the first "Kick Me" sign was placed on someone's back, and leave it at that?


See, you just never know what you're going to discover here. I bet you weren't expecting a history lesson today, were you?.....Well that makes two of us because I didn't think I'd be giving one. Don't worry, there isn't a test at the end.


Anyway, in recognition of April Fool's Day this year, I almost made "faux" Fried Clams and Tartar Sauce.....but before you begin vomiting, I should tell you that it was really only fried banana pieces rolled in graham cracker crumbs, then dipped in vanilla buttercream frosting made to look like tarter sauce. That thought isn't much better is it? Seriously, I nearly made myself sick just thinking about it. I love Fried Clams and Tartar Sauce....but I'd rather have the real McCoy. Instead I chose to make these Spaghetti & Meatball Cupcakes because not only are they cute, but they are delicious, fun and easy to make. I really wanted to make a large cake shaped like a "bowl" of "spaghetti & meatballs, but my co-workers haven't had cupcakes in a couple of months and are beginning to feel neglected.


I used a Chocolate Espresso batter to make about two dozen cupcakes. Since I didn't want any huge cupcake "tops" to form during baking, I was careful to only fill the liners about halfway.


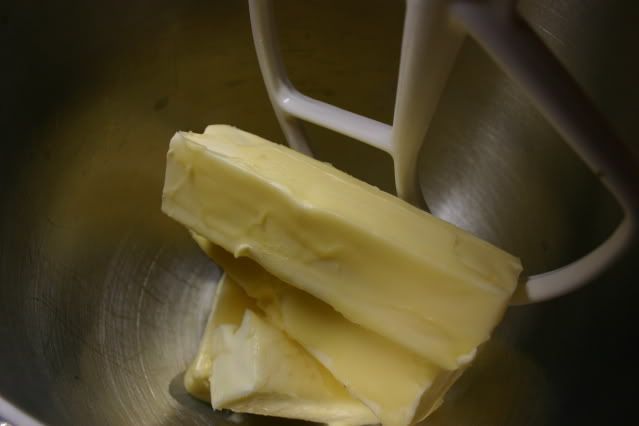
I whipped up two batches of buttercream and lightly tinted it a very pale, pale yellow....like the color of spaghetti.


Then when the cupcakes were completely cool I started to decorate them. I crumb-coated the tops of the cupcakes first, just to make sure that the chocolate color didn't show through the icing. To make the "spaghetti", I used a number #5 decorating tip with a 12 inch pastry bag and created swirls on each cupcake. I made sure to cover the entire top of the cupcake building the form out and upwards.


When all of the cupcakes had been covered, I put them in the refrigerator to let the buttercream "spaghetti" set and firm up a bit. In the meantime, I snapped my fingers and conjured up a batch of mini cakeballs to use as the "meatballs".

Now of course you can't use real tomato sauce..........or maybe you could, but that would really taste gross, so I heated one 12 oz. jar of Strawberry Jelly until it was a syrupy consistency.......


...then I added it to a little bit of buttercream frosting, just to thicken it up a bit ( sounds really gross I know, but trust me...it tastes really good) and used a small squeeze bottle to pour it over the "spaghetti and meatballs".


Oops, I almost forgot the white chocolate "cheese" sprinkled on top....


Spaghetti and Meatballs with Cheese??


APRIL FOOL!


Saturday, March 28, 2009

The "F" Word


I'll admit it.

I use the "F" word a little more than I should. C'mon, we've all said it at one time or another. It's a word we use to fit a variety of occasions but let's face it, mostly we use it because it just feels great to say it. Some of us say it a lot more than others. I can't remember exactly the first time I heard the "F" word, but I do know that I learned it at a very young age from my mother. She used it a lot. She probably learned it from her mother. Now that I think of it, I've heard the word used many times in my immediate and extended family. The disturbing thing is that kids are no exception. It's shameful but I've found that nothing in the world will bring a smile to a child's face quicker than the "F" word.


Now if you are anything like me, when I am in a bad mood and I use the "F" word, it immediately makes me feel better. It's a terrible weakness I know, but the word itself brings such satisfaction that I just can't deny the occasional indulgence. Although I don't use the "F" word everyday, it feels so good to shout it out every so often, in fact, I feel a huge one coming on right now..........close your ears.........here it comes................

FUDGE!!!!!!


Well, what in the heck did you think I meant?


So now my secret is out. I've found that the "F" word can bring even the most reformed Chocoholic to their knees. Over the years I have collected many different Fudge Recipes from many different people.....and although there are many easier and quicker recipes, I always fall back to my old favorite that I've used for years. It's the one I started with about 40 years a long time ago. It's a little more time consuming, but in my humble opinion, it is totally worth it. This is the real deal. No shortcuts. This fudge is so good it could make a train take a dirt road. Oh.....so you don't believe me??? Try it and see....I double-dog dare you.

You will need:

2 cups white sugar
1/2 cup cocoa
1 cup milk (not skim or no fat...what's the point?)
4 tablespoons butter (not margarine)
1 teaspoon vanilla extract


Start by generously buttering a 5 x 9 pan....OR sometimes I use a round 8" cake pan. Whatever works for you...just do it. :) You can also use cooking spray to grease the pan.....it works just as well. Then set it aside and start the show!

Combine the sugar...

cocoa.....

..... and milk in a medium saucepan.

Stir to blend, then bring to a boil, stirring constantly. Reduce heat and simmer. Do not stir again.

Hey! I said don't stir it again.

Hard to resist, isn't it??

Carefully attach the candy thermometer to the inside of the pan and cook over low heat until the temperature reaches 238 degrees F(114 degrees C) or the soft ball stage.

I can't believe that I am still using my mother's candy thermometer from the 50's. See the lady on the box...doesn't she look happy?? She's holding up the candy thermometer saying "Hi, I'm wearing pearls and making fudge". She must be medicated.


Anyway, if you are not using a thermometer, then cook until a drop of this mixture in a cup of cold water forms a soft ball. Feel the ball with your fingers to make sure it is the right consistency. It should flatten when pressed between your fingers. Keep in mind that it will take about 50-60 minutes at a low rolling boil, over low heat for it to reach the soft ball stage. Remove from heat. Add butter and vanilla extract. Beat with a wooden spoon until the fudge loses its sheen. Do not under beat. (If you want to make marshmallow or nut fudge, pour a little fudge into the pan, just enough to coat the bottom, then add the marshmallows and nuts before covering it all over with the remainder of the fudge.) Pour into the prepared pan and let cool. (Try not to stare at it) You should get about 60 pieces from one batch.


Then carefully step back, take a deep breath, spin around, click your heels three times and shout "FUDGE - IT!"

Feels good, doesn't it??


Now close your eyes and eat a piece.

Just one piece please.

See..didn't I tell you?


Ahhhhhh. Giddy Up.


Saturday, March 21, 2009

Good Grief, Isn't It Spring Yet???

I want Spring.

I want Spring NOW.

RIGHT NOW!

Seriously, I've been looking forward to Spring since last October when that very first New England winter chill roared down from Canada and chilled me to the bone. Lucky for me, my hot flashes have kept me pretty balanced out throughout the winter, otherwise you would have certainly found me out on a ledge by now.


I think it's accurate for me to say that the older I get....the more I despise the cold weather. I know that technically I should "keep" better in the cold, but every year I truly hate it more. Really I do. In fact, I stand and face South most of the winter. I think my fellow New Englander's will agree that the winters here can be brutally long. In my opinion, this explains why the Pilgrims only lived until age 35. They were trapped here! They didn't have the convenience of hopping on a plane and heading south for the winter...and since there were no moving vans back then, they HAD to stay here year after year.......... DEATH WAS WAS THEIR ONLY WAY OUT!!


Fortunately, we have a choice. Thank you Jet Blue :)


Anyway, since my overwhelming desire for Spring coincided with my friend Carolyn's birthday, I decided to infuse her life with a little Spring as well. Flipping through the April 2009 Martha Stewart Living magazine, I came across an ad for Martha's Spring baking collection at Macys. The cake on display in the ad was gorgeous. It represented Spring and the promise of new life, a new season......(Wow, where the heck did that come from?) Seriously......I needed to shed my winter coat and I just loved the idea of making something fun and Spring-like, so I used it as my inspiration. Isn't it pretty??


I started by making enough Chocolate Espresso cake batter to fill two 8" round cake lined cake pans. I had some batter leftover, so I made a few cupcakes too. Instead of using the obvious candy eggs, I wanted to try to make egg shapes from cake balls to represent the "robin's eggs" on the top and sides of the cake. I shaped the "eggs" by making a ball then tapering and elongating one end slightly. (Yuck, this can be SO messy!)


After freezing the "eggs" for a few hours, they were ready to be dipped. Since I couldn't get that perfect "robin's egg" blue color I needed for the eggs, I made it by melting and mixing white, light green and a few navy blue candy wafers. After dipping them, I set them on wax paper to dry. (The eggs look more green in this photo, but they are most definitely blue!)


Next, I had to create the chocolate "nest" for the eggs. It was a toss up between melting chocolate and creating scrolls for a nest or using Chow Mein noodles coating with chocolate. The Chow Mein Noodles won. I thought that they might look a little more like a nest than the shaved chocolate scrolls. I used a 12 oz. bag of Ghiradelli Milk Chocolate Chips, 3 tablespoons of Canola Oil, melted it over a double boiler then slowly added a 5 oz. can of Chow Mein Noodles. (For the record, next time I would use about 7 oz. of the noodles) They have to be folded in carefully or they will snap like twigs (pardon the pun). When all the Chow Mein Noodles were covered, I took them out in small bunches and carefully used my hands to "mold" them into a nest-like shape to hold the cakeball eggs. Then I put them in the fridge to chill.


Sorry that I didn't take pictures of the Chow Mein "Dip". My hands were kind of messy and "Emily" hasn't learned how to operate the camera yet. Next time, I promise!


After crumbcoating the cake, I gave it a finish coat of chocolate icing and set the nest and the eggs on top. I opted for a thick buttercream rather than the dark chocolate ganache that was used in the Macy's photo. I finished it off with a birthday script in blue buttercream and smaller eggs tucked into the icing around the base.


Many thanks to Macy's and Martha for the inspiration! Carolyn loved her birthday cake and for the first time in almost six months I can finally see the light at the end of that long winter tunnel. Although the way my luck runs, it's probably just the headlight of another snowplow.


Saturday, March 14, 2009

Repeat After Me....50 Is Nifty


My brother-in-law John, turned 50 this weekend.


Now ordinarily I would pelt him with lots of age-related jokes and good wishes in addition to an age appropriate birthday card........however, since John is a year younger than I am, this year I bit my tongue. I sat in that hot seat a year ago and I know what it feels like to reach that horrific milestone. Even though some people will proclaim that it isn't a big deal, trust me...........it is. So if you want to argue the point, be forewarned, I will smack you with my cane.


Although John didn't want a party, my sister secretly invited family and a few friends to a sort of "Open House" type of gathering to help him celebrate. She asked me to make the cake and since John eats and sleeps the Boston Bruins, she asked if I could make him a "hockey puck".


"Okay.....poof....you're a hockey puck!"


Perfect choice.


Since we didn't have an exact guest count, I decided to make him a nice big, rich double layer 12-inch round Chocolate Espresso cake with Milk Chocolate frosting. ( Wait, I just fainted.) I wanted a cake big enough to make a nice presentation as well as to easily feed 25-30 people.


Since I was going to use commercial sized cake pans for this project, I decided that this was as good a time as any to test some theories from my Baking Science textbook. One thing I have always questioned is the use of parchment paper to line the bottom and sides of the cake pan. My mother always did it for her cakes although she never explained why. The fact is that when you bake a cake in a metal pan, the batter around the edge (next to the metal) will bake the fastest. Since the cake will cook from the outside in, the remainder of the batter in the middle of the pan will have no where else to go but........up! When you line the bottom and sides of the pan, not only does it make it easier to remove the cake after baking, but the parchment helps to re-direct the heat generated from the side of the pan. The temperature of the pan remains consistent throughout all the batter and the result is the cake will rise evenly. So I tried it.....


See?? The cakes are evenly baked all the way across......


(Dang it! No more cake scraps to nibble on.)


Even though no one was really expecting it, I baked a third cake so I could make Cake Balls. Partly because they're always such a hit at parties, and partly because my nephew Cam wouldn't let me in the door without them.


While the cakes were cooling I whipped up a large batch of Milk Chocolate Frosting to use as a crumbcoat (of course I could share this decadent family recipe with you..........but then I'd have to shoot you). Even though I was using fondant for this cake, it still requires a light coat of frosting to give the fondant something to stick to. Now, for those that are not familiar with the term, a "crumbcoat" is an extremely light undercoating of frosting. It serves to bind any little crumbs together and act as a "primer" for the other layers of frosting or in this case, fondant. After the crumbcoat, I refrigerate the cake for at least an hour. I don't roll out the fondant until I am ready to cover the cake(s) or the fondant will dry out too quickly.


While I usually always have basic black and white fondant on hand in "convenient" commercial sized 10 lb. tubs, I will usually use food coloring/flavorings to make any other colors I need. The Boston Bruins are an easy gig to work on. Their colors are black, white and gold.


I use a commercial food coloring gel instead of paste. I think the colors are more vibrant and it is easier to mix into fondant. See how only six drops of Lemon Yellow and three drops of Juicy Orange will make a fabulous Bruins Gold!


Now, the whole secret to working with fondant is SPEED! The faster you can roll it out evenly, get it on the cake and smoothed out, the better the end result will look. I use a sprinkling of cornstarch to keep the fondant from sticking to the rolling surface, and a variety of designated tools to smooth it out once it's actually on the cake. The rest is all just measuring and cutting.


So, have I already mentioned that my brother-in-law is a huge Boston Bruins fan?? My nephew Cam, was born at about the same time that Cam Neely played for the team. Coincidence? Hmmmm. Maybe.


One year, (I can't remember if it was for Christmas or his birthday) my sister used some of her former corporate connections to get John a hockey stick which had been personally autographed by the famous Bobby Orr. Just the mere thought of it still makes him tremble. I think he holds his breath and genuflects when he walks by it hanging on the wall. Sometime a few months ago, one of John's co-workers won a contest to "Skate with the Bruins". He took John with him. They both got to wear the Bruins uniform and actually get on the ice and skate with some past and present Bruins team members during a practice. You couldn't talk to him for weeks afterward. For John's birthday this year, a friend gave him a hockey stick autographed by all of the current Boston Bruin players. The oversized flatscreen in my sister's house is almost always tuned to a hockey game....in HD and stereo surround-sound of course. It is a well-known fact in our family that you will be banished from the room for attempting any type of conversation other than "hockey talk" while a game is on the television. Because of this rule, my sister and I have become almost fluent in both lip-reading and sign language, although I have to admit that most of the time our "signing" is directed at John. :)


So to say that John is an avid hockey fan is merely an understatement. I personally believe that fifty years ago (that's right, count 'em and weep), John was born with hockey skates on his feet and a hockey stick in his hand, so I have become accustomed to his obsession for sport of hockey and the Boston Bruins. I know that he is much more than a week-end "couch skater"........


He is truly one of them. :)


Happy 50th Birthday John!!

Monday, March 9, 2009

Fruit Pizza?


Who in the heck would put fruit on a pizza?


Yuck! Two items I would never think to combine in a recipe. Yet when my friend Dawn made this for our skating team several years ago, people couldn't get enough of it. It brought them to their knees. The texture, the wonderful combination of tastes....fabulous!!! It's a recipe that's been around for a while, but since there's always that one person who will ask "How did you make this?", I thought I'd just show you. It is such an unusual combination, but it works.


Since that day, I have re-created her recipe at least twenty times, however over the last few years I have omitted using the semi-translucent orange/lemon glaze that was supposed to blanket the top of the "pizza". I didn't care for the taste (a bit too sugary for my liking) and I also felt it covered up the beautiful colors of the fruit. Instead I added a sprinkling of mini chocolate chips (newsflash...I used chocolate) and sometimes (when no one is looking) I even sneak in a drizzle of melted chocolate. The result is as beautiful to look at as it is delicious to eat.

You will need:


A round pizza-style pan
1 -16 oz. Pillsbury Sugar Cookie Dough
1/2 cup mini chocolate chips
12 oz. whipped Cream Cheese
1 Cup of Granulated Sugar
2 Cups of Strawberries, sliced
1 Cup Green Grapes (halved)
2/3 cup large, fresh Blueberries
1 Medium sized Banana (semi-green)
1 Can of Mandarin Oranges
1 Can of Chunk Pineapple
1 fresh Kiwi Fruit


Feel free to explore the produce section of your market. Almost any combination of fruits will work...........except maybe grapefruit (ugh).....or even worse, prunes.

Pre-heat the oven to 350 degrees. Open the package of cookie dough and roll it into a ball. You may have to sprinkle your work area with a little flour to keep the dough from sticking.


Using a rolling pin, flatten the dough as much as you can. Transfer it to the pan and use the palm of your hand to flatten it to the edges all around. Trim away all the excess dough that hangs over the pan and gently give the edges a nice "crimp" before popping it into the oven to bake.


Ahh, just a little "heads up" here.....although it looks pretty, make sure that you are paying attention (ahem!) to what you are doing when you crimp the edges of the cookie dough. You do not want the edge to hang over the side of the pan at all. Cookie dough does not behave the way a pie dough does. Instead of crisping in place, the dough will rise and spill out all over the bottom of your oven. (My whole house had a burned cookie dough smell for days.....I'm still airing out.)


Now the idea here is to have your cookie "pizza" crust on the soft and chewy side rather than the hard and crunchy side, although it's probably a matter of personal taste. The cookie dough recipe calls for a 12 minute baking time, but I like to eyeball it as well. As soon as I see the cookie dough starting to brown, I take it out of the oven and set it aside to cool completely.


I use my wooden pizza peel to take pans in and out of the oven. Wow, I can't even remember the last time that I used it to actually make pizza. I bought it almost twenty years ago and it is one of the most invaluable kitchen tools that I own.


I prepare all of the fruit while the cookie crust is cooling. Any canned fruit that you decide to use must be completely liquid-free. I usually drain all of the juices then lightly pat the fruit with paper towel to remove any excess. All fresh fruit should be washed and also lightly patted dry with paper towel. The bananas are the only "high maintenance" fruit here. I usually hold off on putting banana slices on until just before I serve. I always try to select greenish-yellow bananas as they usually don't turn brown as quickly.


Place the whipped cream cheese and sugar in a bowl and mix it together, preferably with an electric mixer. In order for the sugar to dissolve into the cream cheese, I try to mix it for about two minutes. Make sure the cookie crust is completely cool, then using a large spatula, "frost" the top of the cookie with the cream cheese mixture bringing it almost to the edge all the way around.


Then, arrange the fruit on top of the cream cheese mixture, sprinkle with mini chocolate chips and if you'd like, some chocolate syrup. I sometimes like to serve this with a giant delicate dollop of Ben & Jerry's fat-free Cool Whip on the side.

Finito!


Now I think it's worth mentioning here that you could also do a variation of this recipe by just slicing the cookie dough off of the roll to make individual cookies. Bake the cookies as directed on the package, then when they are cool, spread them with the cream cheese and sugar mixture then top with fruit and chocolate chips. They are so easy to make and it will bring 'em to their knees!


Bellisimo!


I bet you'd never find this in a pizzeria in Italy.

Buono da mangiare!


Saturday, March 7, 2009

Come over to the Dark Side........We have Cake.


I was definitely on the Dark Side this week.


I just couldn't shake it. I think I had a kind of a "baker's block".....sort of like having writer's "block" I guess. This post was much easier to write than it was to come up with a birthday cake idea for my 8-year old nephew. I mean, I had NOTHING. No ideas. Zip. Zilch. Nada. My only consolation was that he is the type of kid that takes pleasure in just about anything, so it made me really want to put a little extra effort into making him something special.


But I couldn't think of anything.


Of course when I made the mistake of asking him what type of birthday cake he wanted, he thought for a few seconds and hesitantly said, "I don't know..........maybe a Scooby-Doo cake?" I immediately focused on the fact that he hesitated before answering me. It gave me the necessary reason to believe that he really didn't care WHAT type of cake he had. Also, I needed a reason to justify my decision not to bake a Scooby-Doo cake. Call me crazy, but I have never been a fan.


I still didn't have a clue of what I was going to do. I had almost decided to just bake him a baseball cake when my friend Michele gave my baker's "block" a little shove. When I told her that I couldn't come up with any good ideas for an 8-year old's birthday cake, she stared at me disbelievingly, then slowly and distinctly started spewing the names of Star Wars characters. Chewbacca, Luke, The Death Star, The Millenium Falcon, Darth Vader, C3PO and R2-D2. Wait...R2-D2??.........................R2-d2!!!!!!!


That's it!


R2-D2, of course! My nephew's bedroom has a Star Wars theme and if he is knee-deep into Star Wars play mode he will almost always answer to the name Luke. What was I thinking? It was the perfect solution except I wasted so much time trying to make a decision, now I didn't know how I was going to pull it off. I only had about 2 hours that night to start it and 2 hours the next morning to finish so I threw some cold water on my face, took 800 mgs. of Motrin, donned my Wonder Woman apron and quickly downshifted into "vortex mode". The clock in the hallway had just struck 11 p.m. when I was whipping up the Devil's Food cake batter. I poured it into four 4-inch baby spring form pans and popped them into the oven.


After baking and cooling them, I leveled off all but one of the cakes. Since the cake needed some additional stability, I used plastic straws as a means of support through the center of all the cakes. Then I stacked and crumbcoated it with vanilla buttercream and put it into the refrigerator for an hour or so to "chill out".


Now I needed to design R2-D2's "legs", but I knew it couldn't be done with cake......too crummy. Having worked with Rice Krispies and marshmallow before, I knew that the mixture would hold up to sculpting, so I made enough to fill a 9 x13" pan and let it cool completely. I measured the length I would need on each side, then carved it out.


After I shaped R2's "legs", I covered everything in white fondant and attached the legs to the body with lollipop sticks. Then I lightly covered R2 with Saran Wrap, patted his little round head and left him tucked away in a corner of the counter until the next morning.


(Note: Remember, fondant does not like to be refrigerated.)


The next morning (after several cups of coffee), I used a beautiful royal blue colored fondant to cut out various shapes for the frame. Then I sipped mixed vodka, a dab of black food coloring, a dab of blue food coloring and edible silver dust to get a very glossy silver-gray color that I used to paint on R2's "head". Then I finished R2's body with a touch of red, blue and black fondant pieces.


And the little guy started to come to life....


As I've said before, riding by on a fast horse, you would miss the little imperfections (that I see) in some areas of R2's little body...........at least I hope you would.


Just a random musing here...
If Darth Vader went to grade school,
this could be his eighth grade photo.


Cue the Stars Wars music...


Ah-h-h-h. That smile means a sweet success!


Happy Birthday Cody!
Love you buddy,

and

May the Force be with you!