Monday, March 2, 2009

The Cake Ball Pop


What in the heck is a Cake Ball??


That was my initial thought upon hearing about these cute little cake "bites". I needed to know the name of the genius who invented them because they are nothing short of BRILLIANT! I had to know. So I went on an extensive internet search and came up with .......absolutely nothing. Can you believe it?? No names, no secret recipe, no cake ball archives, no culinary history. Nothing. Not one person claims to be the first to come up with these mouthwatering little beauties.


Amazing.


The internet baking world is inundated with these sweet little treats in all flavors and colors. In fact, there are a couple of websites solely dedicated to them......so where did they originate??? Apparently we are supposed to believe that these sweet little round confections have been in existence since the beginning of time. Do you think cavemen invented them right after they invented the wheel?? That would sort of make sense......okay, I'm being ridiculous. Who cares who invented them?? The important thing here is that I'm making them, and they are fantastic!!


Cake Balls are a snap to make. Like I've always said, if you can read you can cook. Just follow the directions and you will totally "Wow" your friends and family. The recipe is a simple one. I used a Duncan Hines Strawberry Cake mix, Devils Food Cake mix, two containers of instant frosting and a couple of bags of candy wafers. Following the directions on the box, I baked each of the cakes in a 9 x 13 pan for about 40-45 minutes in a 350 degree oven and let them cool completely.


When the cakes were cool, I turned them out of the pans. After placing all the cake pieces into a large bowl, I used my little Kitchen Aid hand mixer to break it up into tiny pieces.


I added about 1/2 to 3/4 cup of the frosting and continued blending it together. For the Strawberry Cake I used Whipped Cream Cheese Frosting and the Devil's Food Cake I used Milk Chocolate Frosting.

Using a small melon ball scooper, I shaped the mixture into 1"balls. Each cake mix should yield between 40-50 of them. (That's a lot of Cake Balls!) After they were all formed, I placed them on a cookie sheet and popped them into the freezer for at least 4 hours. The Cake Balls are easier to dip and work with when they are frozen.


While the Cake Balls were "chillin" in the freezer, I melted the candy wafers (or bark candy) in a double boiler. If you don't have one......improvise, because I wouldn't advise melting the candy directly over heat. Either put the candy in a bowl over boiling water or use the microwave.


I feel it necessary to caution you here. Based on my past
experiences, d
on't get any water or condensation into the candy. Any trace of moisture will cause the candy to "seize" up. It has the same effect as adding water to flour. It becomes an unworkable and gooey MESS!


I've used several techniques for dipping these Cake Balls but have found one that works best for me. I worked in small batches, taking only about a dozen out of the freezer at a time. For this batch I decided to convert my Cake Balls into Cake Pops, so I used lollipop sticks to skew them. I placed the stick about halfway into a Cake Ball and held it over the melted candy in the pan. With the other hand I used a tablespoon to evenly coat each one, I constantly turned the Cake Ball to keep the drips drying evenly. As soon as the candy stopped dripping, I placed the stick into a styrofoam pad to keep it upright while they finished drying. And then because they were so pretty to look at.......I just had to take some pictures....


and a teeny bite.....


Wait!!!! I almost forgot to mention that you can roll the Cake Balls in different toppings too. I found that it was best to do this in the 2.5 seconds between coating the Cake Ball and standing it up to dry. You will find that if you roll it too soon, the mixture will clump up in the candy coating and slide off. If you wait too long to roll, nothing will stick to the Cake Ball.

But if you are lucky, you will hit it just right!


You can use so many different toppings too....chopped nuts, chocolate jimmies, non-pareils, white coconut and toasted coconut just to name a few. How many different ones can you come up with?


I love the fact that you can use any cake/frosting combination with these. There are no rules. Lemon cake, lemon frosting and chocolate coating....Carrot cake, cream cheese frosting and vanilla coating...Pumpkin cake, cream cheese frosting and cinnamon vanilla coating. I even read about using crushed up Nutter Butter cookies, cream cheese frosting and chocolate coating to make Chocolate Peanut Butter Balls.


Gulp.


You can store your Cake Ball Pops in an airtight container in a cool, dry place. Keep in mind if you store them in the fridge, you may have condensation issues when you remove them. Trust me....they will stay fresh for up to about 7 days if you hide them in a nice cool corner of your kitchen (yeah, good luck with that). Maybe I should add "under the watchful eye of a sentry".....

Although I am a die-hard fan of chocolate cake, I have to say that the strawberry cake I used for this batch
of Cake Balls is such a beautiful rosy-pink color, isn't it? Oh...........and they tasted great too!


You're still sitting there reading this??


Why haven't you started your Cake Balls yet?


Saturday, February 28, 2009

The 3 Minute Chocolate Mug Cake


Just when I thought it was safe to go back into the kitchen.....


I received this recipe from my good friend Sheila who lives in Florida and is a fellow Chocoholic. After reading through the recipe, I wondered why hasn't anyone come up with this before?? Turns out, they have. It's all over the internet under a variety of different names. Chocolate Mug Cake, Dangerous Chocolate Mug Cake, etc. In any case, the recipe is so simple I decided to give it a whirl.


4 Tablespoons of Flour (not self-rising)

4 Tablespoons of Sugar

2 Tablespoons Cocoa

1 Egg

3 Tablespoons Milk

3 Tablespoons Oil

3 Tablespoons Chocolate Chips

1 Capful of Vanilla Extract

1 large Coffee Mug

Add the dry ingredients to the mug and mix well. Continue mixing while adding egg, milk and oil. Add the Chocolate Chips and Vanilla Extract. Place the mug in the microwave and cook for approx. 3 minutes on High Power. Now, depending on the size of your mug, the cake may puff up and rise over the top . I used a HUGE mug, so there was no mess to clean up. Remove from microwave and allow to cool a bit before tipping it out onto a plate. (Try and restrain yourself from using a straw)


Please note that I made a slight change to the recipe by using Canola Oil instead of Vegetable Oil, the difference being that Canola Oil is lower in triglycerides and has a lower ratio of saturated to unsaturated fats than Vegetable Oil (C'mon...like it matters right? We're talking about 3 tablespoons of oil and I'm eating a big gooey piece of Chocolate Cake here). I also substituted 3 tablespoons of roughly chopped semi-sweet chocolate for the chocolate chips hoping that bigger pieces will equal bigger flavor........


AND IT DID.


This recipe is perfect for two people............unless of course you are incredibly selfish and are also a member of Chocoholics Anonymous. It occured to me that in addition to serving it plated, you could also eat it right from the mug. Wow! Ingenious, right?? To top it off I added an 1/8 teaspoon of Coconut Extract to about a 1/2 cup of fat-free whipped cream and garnished it with some toasted coconut.


Sounds delicious right? Well, after a hard work-out at the gym today I was feeling guilty, so I attempted to figure out the amount of calories in this sinful treat.


4 Tablespoons Flour =
105 calories

4 Tablespoons Sugar = 96 calories
2 Tablespoons Cocoa = 40 calories
1 Egg = 54 calories
3 Tablespoons Milk (lowfat) = 12 calories
3 Tablespoons Canola Oil = 360 calories (that's right!)
3 Tablespoons Chocolate = 180
Capful or 1/8 Tsp Vanilla Extract = 8 calories

For a Whopping Total of 855 calories
(Wow, could that be right?)
or you could share it with one other person at 428 calories each,
or share with two other people at 285 calories each.


Yikes.

So I started thinking, what if I substituted unsweetened applesauce for the oil, Eggbeaters for the egg and Splenda for the sugar?

3 Tablespoons Unsweetened Applesauce
15 calories vs. 360 for the Oil
1/4 cup EggBeaters
30 calories vs. 54 for the Egg
5 Tablespoons Splenda
0 calories (that's right!) vs. 96 for the Sugar
(I increased it by 1 tablespoon)

Using these ingredients should cut about 441 calories from the entire recipe making this "slenderized version" only 414 calories OR if you are sharing with one other person......207 calories each AND it tastes delicious too! Rich and chocolate-y with half of the calories. In my opinion, there aren't enough chocolate recipes out there that cater to those of us who may be a little "calorically challenged" (although No Pudge Brownies are fabulous!), so this one is definitely a winner with me.

Now
after all my substitutions, experimentation and careful calculations, my question to you is just this..... if this entire Mug Cake is now only 414 calories...


.........do you still have to share? :)

Tuesday, February 24, 2009

The "Sneaker Cake"


I love working with fondant.

You can roll it, color it and mold it. It reminds me of all of those wonderful brightly colored cans of Play Dough when I was a child. Of course, the only difference is that you can eat fondant.....I can't say the same for Play Dough, although I do remember taking a nibble on a couple of pretend French Fries once. I didn't go back for a second taste. Fondant tastes like marshmallow whereas Play Dough tastes like clay. Blah! In any case, whenever I have the opportunity to work with fondant I learn something new about it. For example, if it's too cold it will be too hard to roll out and work with, if it's too hot it will melt and slide off the surface of the cake. If you leave it uncovered for longer than 5 minutes, it will begin to get hard and have a crusty feel. If you refrigerate it, condensation may form when you remove it and the fondant will "sweat" and fall apart. By the way.........all of these scenerios? Not good.

My baking project this week was to make a birthday cake for the 55 year old friend of one of my clients. I was told his "hobbies" are running and drinking beer (hopefully not at the same time). After careful thought, I decided to attempt a three dimensional sneaker and beer bottle and place them on top of the actual cake. I created the sneaker by baking a vanilla cake in a 13" x 9" pan, letting it cool, then stacking it using buttercream frosting in between the layers. After popping it into the freezer for about an hour or so, I "carved" out the sneaker shape.


Looks a little like an "elf" shoe, doesn't it?


Hmm..
I'll keep that in
mind for
the Holidays..


Then I covered the whole thing with fondant.....


...and it ended up looking something like this......


I can't say that I am 100% happy with it. In fact, I can see loads of mistakes. The fondant started to dry out while I was working with it and it cracked in several places. I'm finding that there is just no way to repair cracked fondant. I don't think Nike will ever endorse this particular style of footwear, do you? It's hideous. Well, as my father used to say when things didn't turn out quite the way he planned, "If you are riding by on a fast horse no one will ever notice". Let's just hope the entire birthday party is being held out on the Ponderosa.


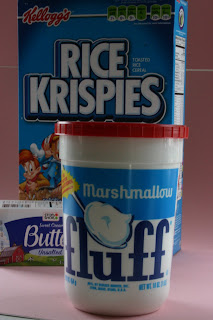
The next part of the project was to make the beer bottle. Using cake would have been too messy and too soft. I needed to use an edible substance that would stand up to rolling and forming. After some research, I ended up using Rice Krispies and Marshmallow to make the bottle shape. That's right....the beer bottle is one big Rice Krispie Treat! Then I covered it with fondant and kept working it until I was satisfied with the shape. To get the feeling of a "glass" bottle, I mixed brown food coloring with vodka and painted it on the fondant letting it dry in between coats (when Vodka dries it leaves a fabulous shine.......like glass). The beer bottle label is white fondant and the name was done with Edible Food Markers.


After crumb coating the Devil's Food cake, I mixed up batches of deep orange, yellow and dark gray buttercream. I used the dark gray for the "road", the yellow for the "highway lines" and the deep orange for the Birthday script. I even added a small fondant "Speed Limit" sign that read "Age Limit 55". Get it??


Many Happy Returns!


(and by that I mean "return" for more cake of course!!)

Sunday, February 22, 2009

The Baking Vortex

It all started innocently enough.


I have always been a lover of cookbooks, so in July of 2008 I decided to go all out for my nephew Cam's 13th birthday by baking these monsterous double chocolate covered cupcakes. I got the idea as well as the recipe from one of my beautiful cookbooks. I literally have about fifty of them in all shapes and sizes. The topics range from Cupcakes to Cake Decorating, from Baking to Fondant. I'll admit it. I'm a pushover for a great looking cookbook.


Now I think it's important for me to mention that I come from a large family of chronic chocoholics, including my parents and their parents and their parents before them.......and my sister and brother-in-law....and my niece and two nephews, and all of my aunts, cousins and uncles too. I am convinced that we have chocolate running through our veins, not blood. I'm serious. Growing up in my family, if someone dropped a dish and said, "Oh Fudge", everyone came running into the kitchen yelling, "Where?"


My many visits to South Carolina to see my Aunt Grace and her family always ended by baking something that contained chocolate. On one of my trips, after experimenting with several recipes from one of my aunt's well-worn and highly coveted cookbooks, I found it stashed away in my suitcase when I arrived home. The inscription says it all.....


Growing up, I avoided cooking or baking anything alongside my mother, unless you want to count a Creme Brule that had to be made for me to receive my Girl Scout Cooking Badge. My mother, being a bit of a control freak perfectionist, found it difficult to allow me to make mistakes, so she almost always did it herself. Actually, the Cooking Badge should have gone to her instead. I have always wondered, just how important is it to stir a sauce clockwise instead of counterclockwise?? Is it true that it can actually reverse the earth's rotation? Well according to my mother forty years ago, if I didn't stir it the "correct" way, yes....it could. So, for the most part my cooking and baking skills were honed while my parents were out of the house. Fudge was my specialty. Still is.

I recently took an Adult Education Course in Cake Decorating at a local high school. It was a very basic course, but enticed me with just enough information to whet my appetite for more. I got "the bug". I gathered up all of my cookbooks and researched the internet. I spent hours and hours looking at pictures of cakes, cupcakes, frostings and fondant. I have taped every episode of Ace of Cakes, Amazing Wedding Cakes and Food Network Challenge and I continue to soak it all in. I frequent web sites and baking blogs to study techniques. And while I constantly test recipes and attempt to mimic even the most difficult designs, my ultimate goal is to create my own original "niche". My co-workers are my taste testers. They tell me what tastes good and what tastes great. The best preparation for me in this new venture was to purchase this book at Barnes & Nobles on the science of baking.


Looks so easy, right? Mix ingredients together, bake it, take it out of the oven and presto.......magically it's done....but how does it happen?? What makes the cake rise?? What makes a cake fall flat??? I always wondered why so many recipes instruct you to cream the butter and sugar together first. Well, now I know. Do you?? This book explains the science behind it. I'm hopeful that each explanation will help me to become a better baker.


So now I am in this up to my neck. But I am enjoying it. It has provided me with another creative outlet and I am finding it quite challenging. It started with one person ordering cupcakes from me and now, it has almost taken on a life of its own. I work from referrals and since I already have a full-time job, I can usually only handle one or two orders a week.


For my sister Kathy's birthday this year, I surprised her by making a Purse Cake. This entire cake is edible. I read books, I looked at hundreds of online photos.......


I started by sketching it out....


then baking and stacking ...


...and frosting them .


...then I hand-carved it,


...and covered it with white fondant.


The "leather" bands are fondant which was stained with brown food coloring and vodka. I used the same technique for the "handles" which are made of gumpaste. I used a fork tine to punch "stitch holes".


I made a paste of gold dust food coloring and vodka and painted the purse "hardware".


Voila.


She loved it.


Saturday, February 21, 2009

My Girl Emily

Hi and welcome to my Baking Blog, SimplySweeter.

Today was going to be my very first baking post however, my dog has been very ill and I have been very worried. So instead of showing you how I frost cupcakes, my very first post is all about her. Hope you don't mind.....

I love my dog.

My spirits are always lifted at the end of a long day by the exuberant greeting of my 10-year old Boxer, Emily. For those unfamiliar with the breed, Boxers are known to wiggle violently when they are happy.....and Emily wiggles 98% of the time. She is 70 pounds of muscle, loves to play with her toys, loves to go for walks and go for a ride anywhere in the car. She is very energetic, always happy, loves people (especially children) and can be fiercely protective.

I am writing about her today because I am worried. Very worried, in fact. Emily was diagnosed with Lyme Disease about two months ago. She just finished her medication and we are off to the Vet for a follow-up this coming Monday. I am hoping that her recent lethargy and digestive issues are only an indication that she needs another round of antibiotics. Since my last Boxer succumbed to cancer at age 8, I am always on the lookout for any telltale signs.....specifically, any digestive trouble but I'm going to try to remain cautiously optimistic, although I can already feel my heart getting heavy. Most Boxers only have a lifespan of 8-9 years. Emily will be 11 years old in May. She has survived a vicious pit bull attack in 2002 and required over 100 stitches in her neck and throat, major surgery to remove a huge mast tumor in her chest in 2004, and in 2006, a case of Bloat (twisted stomach) which required emergency surgery at 3 in the morning... she's a tough girl so I think it's safe to say that she has beaten the odds.

I know it seems trivial. Who cares, right? The economy is the worst it's been since the Great Depression. Thousands of people will lose their jobs this year, many have already lost their homes. Human beings are sick and living with cancer everyday. So I am aware that my concern about the well-being of my 10-year old dog is a mere blip in the world. Except in my world, where I know for a time I will be lost without her. She has been a trusted companion and a rapt listener to my joys and sorrows for the last decade. I know that dogs don't live forever, but at the same time I am ashamed to admit that I am just not ready to let her go yet.


So keep your fingers crossed for us, okay? For just a while longer.