Monday, March 19, 2012

Top o' the Mornin' to you!


I was in a festive mood this week, so I celebrated by whipping up a batch of Green Velvet Mint cakepops, dunked in Bittersweet Dark Chocolate.   

Nice. 


I started with Green Velvet batter....


...sort of like Red Velvet.  Only it's green.


Then I added some Peppermint to the batter.


Just for a special little kick.


They were delicious!


And very green.


Happy St. Patrick's Day!


Erin Go Bragh!

Friday, March 16, 2012

The Pioneer Woman Book Signing in Brookline, MA!


Okay, where was I? 

 Ahhh yes. The book signing with Ree Drummond.


I read her book tour schedule a few weeks ago and saw that she was coming to Boston. Calmly, I called my sister Kathy. "REE IS COMING TO BOSTON, REE IS COMING TO BOSTON"!, I shouted. Then I hung up the phone and sent her an email too.....just so she couldn't say later that I didn't tell her. 

It's a sister thing. Let it go.

In any case, knowing that Ree usually has a large number of attendees at her book signings, I wanted to make sure that we got there early.


Um. Yea. Mission accomplished with that one. We even beat Ree.


Her presentation was being held at the Coolidge Theatre just across the street from the Brookline Booksmith, from 6pm until about 7pm. It goes without saying that it was a sellout event from the moment of it's announcement. So instead of standing in front of an empty table for three hours like a couple of dorks, we decided to head across the street to grab a little dinner.

We ate at a little place in Coolidge Corner, a stone's throw from the bookstore, called the Paris Creperie. It was a tiny cafe-style establishment with phenomenal crepes! We snagged a booth by the door and while we ate our dinner, I kept a wary eye on the bookstore across the street.  It was now 5:15 pm and I suspiciously watched as groups of people crossed the street in waves to go into the theater. The Coolidge Theater holds about 350-400 people and my intention was to beat all of them back into the bookstore before the presentation was over, to get into the front of the book signing line.

It was just then when it started to rain.  Dammit.

Just short of ramming my sister Kathy's crepe up her nose, we finished our dinner and high-tailed it towards the crosswalk.  Dodging big, fat raindrops, we bolted back across busy Harvard Street, and skidded into the bookstore. To my horror, a line had already begun to form. Breaking away from my sister, I skillfully manuevered myself around an elderly woman who was sedately reading a copy of " You: Staying Young: The Owner's Manual for Extending Your Warranty", and jumped into line behind this happy couple.


Meet Carrie and BJ. Awesome couple. He's a firefighter and she's a riot. Not only did they drive two hours from Springfield, MA to meet Ree, but they kept us totally entertained with an Iphone photo montage of tornado damage to their home from last summer. Carrie and BJ were 4th and 5th in line.

My sister Kathy and I were 6th and 7th in line.
(insert fist pumping here)


 And these fabulous ladies were 8th, 9th and 10th.

(again, lots of fist pumping and high-fives)

Meet Andraya, Janine and Beth.  Andraya is Janine's gorgeous daughter and a loyal Pioneer Woman fan. While waiting in line for Ree, she softly told her mother than she was so excited her knees were shaking. So sweet. When Beth found out that her friend couldn't attend the signing,  Beth offered the ticket to Andraia (whom she didn't even know) to hear Ree speak in the theater. So nice, these PW fans. 

And then the long-awaited moment arrived.

 OMG
There she is.


Looking gorgeous! 

She is even more beautiful in person.

The line started to move and before we knew it....we were next.  My sister Kathy manned the IPhone camera while I stepped up to the table with my books. I gave Ree some of my  fancy-schmancy Chocolate Covered Strawberry Cakepops (see the red bag?) and she loved them! We share the same name (Anne Marie) and that led into an easy conversation.

Did I mention that she is also gracious? (sigh)


I bought her newest cookbook as well as her romance novel, Black Heels to Tractor Wheels, and I also brought from home her first cookbook......complete with it's pages slopped with batter, frosting, cinnamon and god knows what else.

She signed them all for me.


What more can I say?  The woman's a peach.

A PEACH! 


After our books were signed, photos taken and good-byes said, Kathy and I clutched our books and grinning broadly, wove our way out of the store. At this point, there were no less than 400 people in line waiting to meet Ree. It was worse than the lines at Disney, if you can believe it.


 On the way back to the car we passed by all of them, around the store, out the door,

...and down the street wrapped around the corner.


The moral of the story? The early bird will not only score you the perfect parking space right next to the bookstore, but it will introduce you to some fun new people, maybe even a New York Times best-selling famous author, as well as get you some fabulous autographed cookbooks. 


Love ya Ree...and thanks!

Thursday, March 15, 2012

I Met Ree Drummond Tonight!


Yes I did.


For real.


She was awesome.

.....and I can't wait to tell you all about it.


......tomorrow.


Thursday, March 1, 2012

Panda Bread!


This was fun.

On the difficulty scale.....I'd give it an 8 out of 10. The challenge for me was not in assembling the Panda, but rather in getting the consistency of the dough just right. It's fun to try at least once, so get your yeast out and let's rock and roll!!

Panda Bread Dough

3 cups of flour
1 egg yolk
1 1/2 tablespoons of unsalted butter
1 cup of milk
1 tablespoon of salt
3 tablespoons of sugar
1 package active dry yeast
2 tablespoons of green tea Matcha mixed with a tablespoon of hot water
1/2 teaspoon of black food coloring mixed with a teaspoon of hot water

Add the egg yolk to the milk and microwave for 1 minute. Set aside. In a mixer (preferably one with a bread hook attachment) Blend the flour, salt, sugar and yeast. After mixing for about a minute, add the butter and milk/yolk mixture and blend on medium until the dough pulls away from the sides of the bowl.

Remove the dough from the mixer and split the dough into three pieces, two the same size and the third a bit smaller.

I used Green Matcha Tea to color one of the larger dough balls green.


It's a bit tricky to add color to bread dough, but if you add about a tablespoon of hot water, the mixing goes along much smoother and you get a much better result.

I used black food coloring to color the smallest dough ball. You might want to wear some gloves before doing this because it's MESSY!!!


The third dough ball isn't colored at all.....poor thing.  :)


Put each dough ball into a greased bowl, cover with clear wrap and put the bowls in a non-drafty area of your kitchen.


 Let the dough rise up until it's about double in size. You have about an hour to two hours for this to happen.......use your time wisely. Why not cut up old charge cards to use as a mosaic for your kitchen backsplash? Ya....I don't blame you. Well, you could do what I did.  Plunked myself down in front of the telly with an icy cold mug of IBC Root Beer. Yes, I did.

I wuz just bein' dang lazy that day.

When the dough has risen up enough, you are ready to roll.  Actually, it's easier to explain the Panda process in pictures......but please pardon the photography. Because I don't get in from work until 8 or 9pm some evenings, I totally miss out on photographing in natural light. So until my work schedule changes.... please enjoy these incandescent shots!!!


Once you reach this point, carefully place the dough, seam side down, into the bread
pan and cover with clear wrap. Let it rise for about an hour.


Bake at 375 degrees for 30 minutes. Once it's finished baking, turn the bread out to cool,


 then slice it up to see the Panda!!!! 


Tuesday, February 7, 2012

Chocolate Covered Strawberry Cakepops!


Cakepops are literally popping up all over the place. Four years ago, no one even knew what they were...and now...they are EVERYWHERE.

Out of the thousands of cakepops I've made, I think that these are my favorite. Strawberry cake, molded into the shape of a strawberry.  Which is not as easy as you may think. Hm.


            I refrigerated them until they were firm enough to handle, then dipped them in red candy melts.


Then I dunked the tops in dark chocolate.


I tinted some white fondant green and punched out some leaves......


Then I attached the leaves to the bottom of the pops with a little candy melt "glue".


Dots of dark chocolate "seeds"....


.....and Poof!  

You're a Chocolate Covered Strawberry!


Happy Valentine's Day!

Saturday, December 31, 2011

The Croquembouche Project

I received my first Martha Stewart book from my sister Kathy in 1988.  Since then, the traditions of Christmas have never been the same. Let's face it.....Martha raised the bar on Christmas. Once upon a time, I was content making a batch of toll house cookies and serving them on a festive snowman plate for the holidays. Until Martha.

The first book that I received was all about the holidays.....lots of recipes and decorating ideas.


I was mesmerized.

I slept with the darn thing under my pillow. Since that time I think I have recreated almost every single item from that book. Except for one. The Croquembouche. Martha's Croquembouche from the book would feed 100 guests and was made with spun sugar "glue" to hold the puffs in place. It was stunning.


(sigh)

That Martha.......aside from the fact that she has a staff of about 100 people to help her.......How does she do it? From that moment, I secretly resolved to add this one to my bucket list..............and this was the year that I was going to do it.

When I announced my plan to my sister Kathy, she roared with laughter.....especially since I have been talking about making this Croquembouche for about 20 years. Herein lies the problem with making that type of declaration..... YOU. HAVE. TO. DO. IT.  CRAP.  What did I get myself in to? Every year I spend Christmas Eve at my sister's house with lots of friends and family stopping by, so I knew that the Croquembouche would be one of the highlights on the buffet table.

No pressure.

First, a bit of history on the Croquembouche.  Croquembouche is a French dessert made by stacking cream puffs in a conical shape and cementing them together with a toffee. The dessert is typically ornamented with sugared almonds, or other ingredients, and it is designed to be displayed as the centerpiece of a table. This dessert has been used at French weddings, christening and celebrations for centuries, and it is served outside of France to add a French flair to an evening's events. It appears to have been invented by French pastry chef Antoine Careme (1783-1833) in the late 1700s, when it became very popular as a wedding cake. Many of the individual components such as the cream puffs date to the 1500s, illustrating the long history of fine pastries in France.

Since it was Christmas Eve and I was really pressed for time, I was a bit remiss in my photography. Sorry...next time I will be better prepared, I promise.   :)

The first thing I did was to make the creampuffs, alias profiteroles. Kathy and I got this recipe from the former head baker of a famous North End Bakery.............so we know it works.

Cream Puff Recipe

1 cup water
2 sticks of butter
1 cup flour
4 eggs

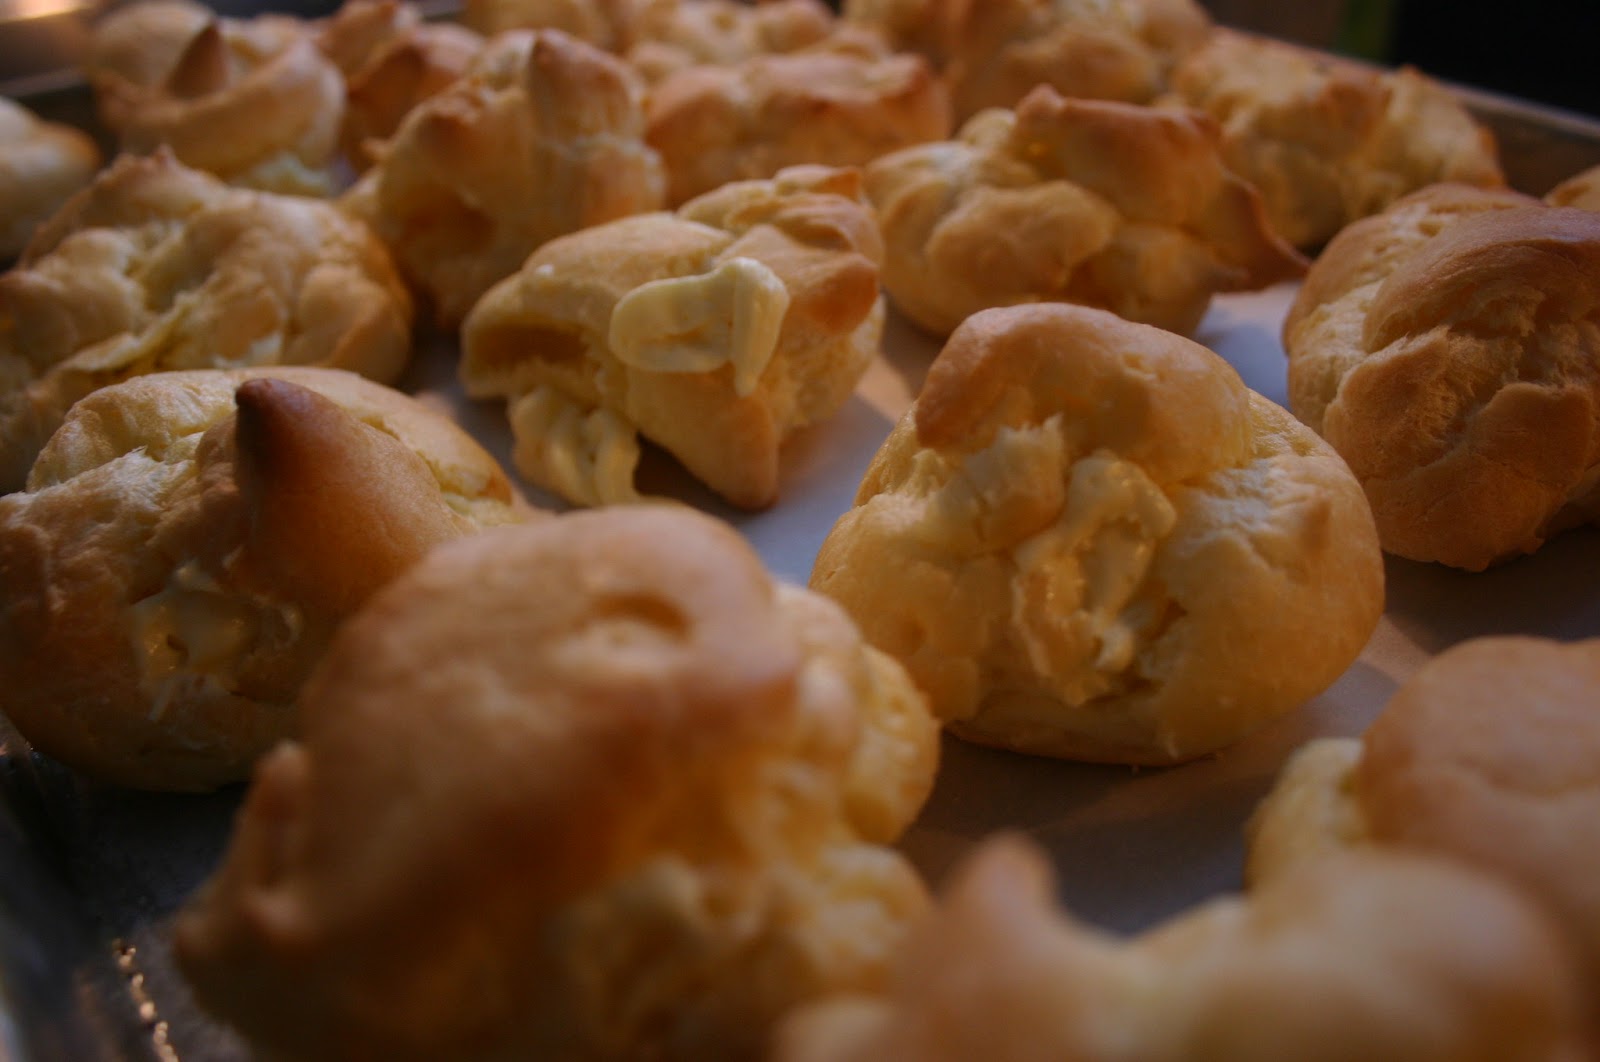
Pre-heat your oven to 400 degrees. Using a large pot (I used my favorite Big Blue), bring water and butter to a vigorous boil, then remove from the heat and add the flour, quickly stirring with large a wooden spoon until the mixture coagulates and pulls away from the side of the pot.  Transfer to a mixing bowl and using the wooden spoon, spread the mixture out along the sides of the bowl to help it cool down. After about 5 minutes, start the mixer and add one egg at a time, beating vigorously in between each one.  After adding the fourth egg, you will notice that the mixture has taken on a smooth and thick consistency. When this happens, it's ready.

Drop by heaping teaspoonfuls (or pipe with a pastry bag) onto a parchment paper covered baking sheet, leaving about 2 inches in between each one.  You want to keep the portions on the smaller side for the Croquembouche.  Place in the oven for 25-30 minutes or until golden brown. Remove from the oven quickly and set on a rack to cool off completely.


Cream Puff Filling

1 box Vanilla Pudding, follow the directions on the box and place in the fridge to cool.


When pudding mixture is cooled, I used a piping bag with a 1/4 inch tip and injected about 1 tablespoon of the cream into the center of each puff. Then I put them on a large baking sheet in the fridge until I was ready to build the structure. 


I made a mold for the Croquembouche out of poster board, packing tape and parchment paper, then I used a fat glass vase to hold it upright.


Now, a traditional Croquembouche uses carmelized sugar to "glue" the puffs together............but since when have I ever been "traditional"?  Since I was working against the clock, I decided to use a more familiar medium. Or should I say, "Medi-YUM"!


In my research I discovered that there are a couple of different ways to construct a Croquembouche. Some pastry chefs use a Croquembouche mold and stack the puffs outside the cone. It's the easiest method of construction and if you are making the dessert to bring to someone's house, your chances are considerably better that you will arrive in one piece. You can also freeform the cone, but this means that you will need to have many more creampuffs on hand to make the foundation. Of course, if you like to live on the edge, you can build the tower inside of the cone too.  A little trickier, but much more fun I think.   Guess which way I did it??


Working quickly, I dipped each puff in melted chocolate and placed it inside the cone along the outside. The idea is to attach each puff along the inside of the cone. The center of the cone is supposed to be hollow. When I got to the top, I tried to make it as level as possible. Okay, I'll let you in on it...... I had to  squish down some of the creampuffs to level it out. Then I put the whole thing in the fridge for about an hour to chill and harden up.   

Once it was was chilled, I placed a plate on the widest part of the cone and carefully inverted it. After a few strategic taps on the side of the cone, the croquembouche unmolded itself.


It's not as pretty as Martha's, BUT with the exception of actually baking the creampuffs, I finished the whole thing in just under an hour. Seriously.

A few red raspberries dipped in chocolate and fresh whipped cream piped in between the puffs and I was ready to go. Kathy whipped up a small crockpot full of hot fudge so guests could help themselves to dessert. 

 It was a Christmas Eve show-stopper!


Happy New Year everyone!!